SharpDevelop + OpenTK Tutorial
Part 2: Prepare for Graphics
Stage 1 - Re-open Your Project
Start up SharpDevelop. One of the panes displays a list of your most recently opened projects. Click on the name of the project you have been working on for this tutorial.

Stage 2 - Switch to Design Mode
Click on the "Design" tab to switch to Design mode.

Stage 3 - Open Your Tool Kit
Now click on the "Tools" tab.

Stage 4 - Take Control
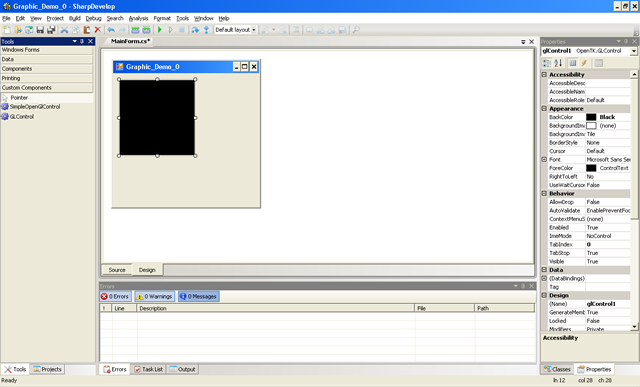
Click on and drag a "GLControl" from the "Custom Components" selection onto the Main Form of the simulated program window.

Stage 5 - Perfect Dark
A small black square should appear on the display. This is your first GLControl!
Stage 6 - Control the Horizontal, and the Vertical
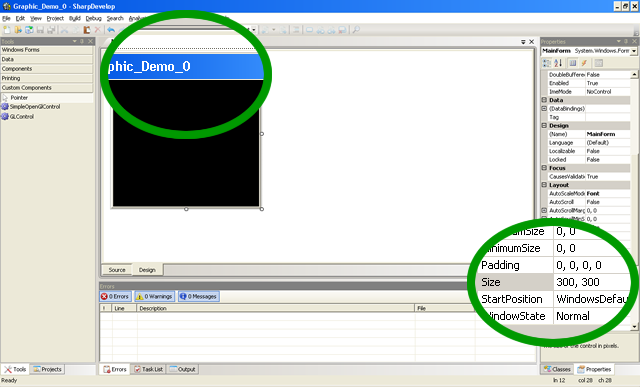
Click on the "Properties" tab near the bottom-right. Among the listed properties are the Name by which the program refers to your GLControl, the Location of the GLControl within the program window, and the Size of the GLControl.
I would strongly recommend against re-namng your GLControl. You're only ever likely to have 1 GLControl in a program (though some effects make use of more than one GLControl), and I'll be using the default name in the code examples which follow in this tutorial.
You may set the Location of your GLControl to anything you wish - I'll be using "0, 0" for this tutorial. Note that the format of this setting is "X, Y".
You may also use any Size for your GLControl. I'll be using "400, 300" for this tutorial. The format of this setting is "Width, Height".

Stage 7 - Window Control
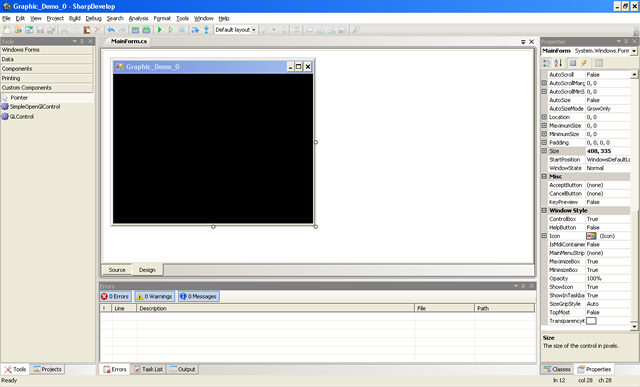
If you have set the GLControl size to larger than "292, 265", then it will be larger than the program window. To fix this, click on the title bar of your design. The "Properties" panel will now display the properties of the main window.
Adjust the Size option of the window to "408, 335". If you have used a different size for your GLControl, simply add 8 to the width, and 35 to the height to create the dimensions of the window which will make it fit seemlessly around your GLControl. We'll cover the removal of this hideous border in Part 4.
Stage 8 - Fits Like a Glove
Your program pre-view should now display the window border fitting around the GLControl without cutting off parts of the GLControl, nor showing any of the window background.
Stage 9 - Events
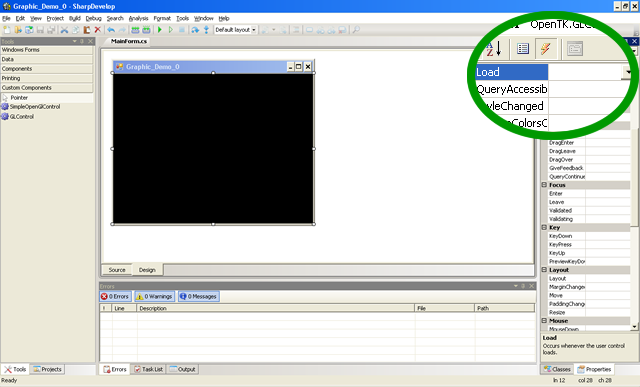
Next click on the black GLControl, and then on the Lightning symbol in the properties pane. A list of Events will now be displayed.

Stage 10 - Loading... Loading...
The first thing your program will do when it runs is load the DLLs needed to make the GLControl work. In order to prevent the program from trying to use the GLControl before it is loaded (which would cause a catastrophic error which will melt your computer and cause the collapse of all civilisation as we know it), we need to create an event-fired function which can be used to tell the rest of the program when the GLControl DLLs have loaded.
The easiest way to do this is to double-click on the empty space next to the "Load" event in the list.
Stage 11 - Still Loading...
SharpDevelop will automatically take you into the code editing pane, and create an event-fired function which you will be able to use to tell the rest of the program when the DLLs have loaded. To do this, we'll need to type in some new code which is not automatically generated - now the fun begins!
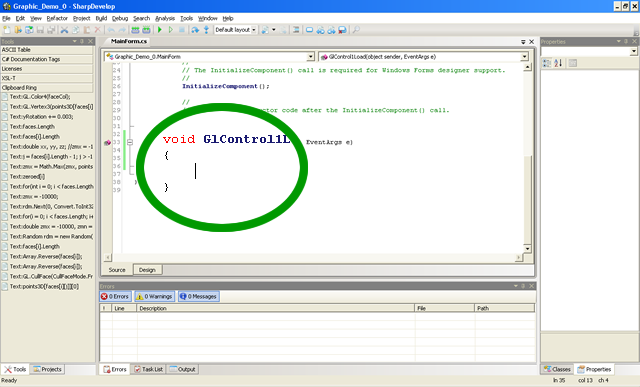
Stage 12 - Coding Structure
Let's take a closer look at the code window. If you have not altered your code yet, it should look something like this:

For the uninitiated, the code can be thought of as many different parts which come together to build the program:
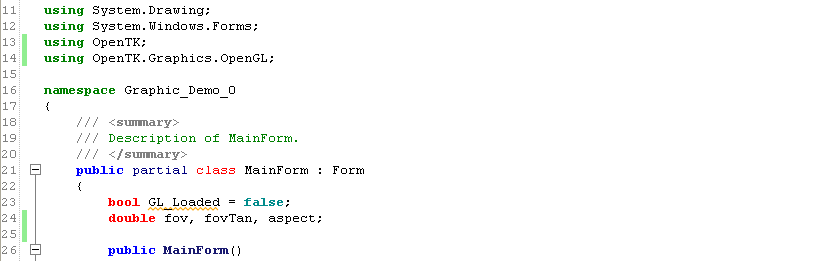
Lines 1 - 8 are the header. This is not essential for your program to run, but you can type comments into it to describe to anybody looking at your code what you want it to do.
Lines 9 - 12 are the included libraries. Each one starts with "using", followed by the name of the library. Some libraries contain other libraries, such as "Collections" being a library contained within the "System" library. We will add more libraries later in this tutorial.
Lines 14 - 38 are the Namespace of your program. This section contains the bulk of the functional part of your program.
Lines 19 - 37 (contained within the Namespace) represent the functionality of the MainForm class, which contains your GLControl.
Lines 21 - 31 (contained within the MainForm class) is the MainForm function which runs when the program first opens. Usually, this function is called only once, making this a useful place to add initialisation code.
Lines 33 - 36 (contained within the MainForm) is the GlControl1Load function which runs when the DLLs needed for your GLControl to operate have loaded into RAM.
Note that these line numbers may be different for your program, and relate to the above code. These numbers will change when you add more code. Also note that the contents of the Namespace, MainForm, and functions contained within are defined within pairs of curly braces ( "{" and "}" ).
Stage 13 - First Code
Create a "Bool" called GL_Loaded within the MainForm class, and set its value to "false".These yellow sections are for the benefit of those with little or no coding experience.
A Bool is a type of variable which can hold one of two values - either "true" or "false".
This variable will be used to track the progress of the GL DLLs as they load into RAM.
Next you'll need to set the value of GL_Loaded to true within the GlControl1Load function. Your code changes should look something like this:


We can now write code which will check the value of GL_Loaded which will make use of GL functionality, but only once the DLLs have been loaded.
Stage 14 - Depth Perception
We have one final task before we finish this part - we must tell the program how small things must look as they move further into the screen. Without this information, the program will display everything as though it were flat, regardless of how near or far it were.In 3D graphics, we use three values, "X", "Y" and "Z", to represent the position of an object in 3D space.
"X" represents the horizontal (left and right) position of an object.
"Y" represents the vertical (up and down) position of an object.
"Z" represents the depth (backwards and forwards) position of an object, as if it were moving behind or in front of the screen.
The first thing you'll need to do is add the "OpenTK" and "OpenTK.Graphics.OpenGL" libraries.
Then create three "double"s in your MainForm class, and call them "fov", "fovTan" and "aspect".A "double" is a numerical data type which is used to represent decimal numbers (such as Pi) with twice the precision of a "float", or floating point value, which is another type of numerical data.
"fov" represents the "Field Of View", which can be defined as an angle - specifically the viewing angle. A larger values represents a wider field of view.
"fovTan" will be calculated as the tangent of the Field of View. It's usefulness will be explained later.
"aspect" represents the Aspect Ratio of the GLControl.
Stage 15 - Zoom!
Now we must put this information to use - create a new function called "SetupViewport" after the "GlControl1Load" function. The availability of this function should be set to "private" and its type set to "void".
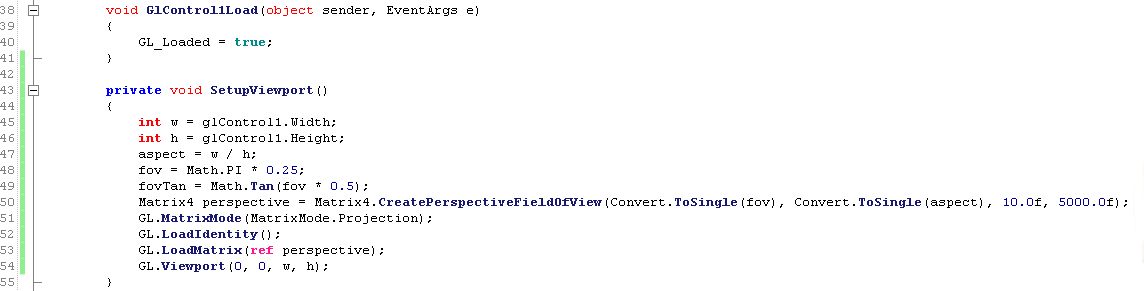
The following is a line-by-line explanation of the function:
The first 2 lines check the width and height of the GLControl, and store this information as a pair of "int" variables, or integers.
aspect (inherited from the MainForm class) stores the result of the aspect ratio calculation.
The fov is then set to 1/4 of Pi radians, or roughly 45 degrees.
fovTan then stores the result of the Tangent calculation of the fov.
A four-component matrix called "perspective" is created, using the fov and aspect values, and the minimum and maximum depth settings of 10 and 5000 respectively. If an object is closer than 10 units, or further than 5000 units from the screen, then it will not be displayed.
The "perspective" matrix is then applied to the active GLControl over the next 3 lines.
Finally, the usable drawing area is set to encompass the whole of the GLControl.
Stage 16 - Call the Function
Finally, you'll need to call the SetupViewport function from the GlControl1Load function. This is very easy to do - simply type in the name of the function, followed by a pair of brackets and a semi colon.
We will also define the background colour of the application as black in the next line.

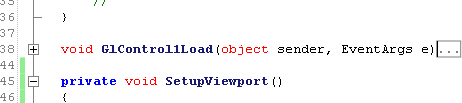
When you are done, click on the "minus" symbol next to the name of the GlControl1Load function. The contents of the function will now be hidden, but can be accessed by clicking on the "plus" symbol at any time.
All that's left of this part is to save your project, and join us again in Part 3.
If you wish, you can download the source code for this part of the tutorial here.
We're still quite a few stages from actually drawing anything, but the preparation is just about complete. In Part 3, we will define the target frame rate, define the 3D shape you wish to draw, and then draw it!
1 | 2 | 3 | 4 | 5